Tuesday 29 November 2011

Texturing My Tie Fighter - Part 3

I now wanted to texture the final part of my ship, the cylinder. 

In 3dsMax, I added a 'UVW Map' from the Modifiers list to the cylinder to create a map of the object.


I then added an 'Unwrap UVW' from the Modifiers list to flatten the map out so I would be able to texture it.


On the Unwrap UVW panel, I clicked on the 'Open UV Editor'.


I was then able to render the UV map and save it ready to import into Photoshop to create my texture.

Here is what the rendered UV map looked like:


Once I'd imported the UV map into Photoshop, I started by filling the biggest centre circle in with a dark grey using the Fill tool. This part of the cylinder was mostly positioned within the sphere of the ship so only a small amount of it was on show. 

For the next circle, I chose a light grey colour and filled most of the sections with this colour. For the remaining circles and each of their sections, I filled them with a slightly darker grey. This meant that most of the cylinder was filled in with this colour. 

Now that most of the cylinder was filled in, I just wanted to add a bit of detail onto the circle with the biggest sections, which was the main part. I did this by using the Box tool and choosing a dark grey colour. In the top and bottom centre sections, I drew a horizontal box and then a vertical box coming out of it. For the vertical box, I drew a lighter grey line within it too. 

For the various other sections, I drew a mixture of dark and light grey boxes. For some, I copied and pasted the box and positioned it to its opposite section and rotated it using the 'Transform' tool if needed.

Here is what the final texture looks like: 


Now that the texture for my cylinder was complete, I went back into 3dsMax to load the image using the Material Editor.


Once I'd selected the image and applied the texture to the cylinder, here is what it finally looked like:


Texturing My Tie Fighter - Part 2

I now wanted to create a texture for the body sphere of my ship. Before I did this, I needed to create a UV map.

I started by applying a 'UVW map' from the Modifiers list to the sphere, which creates a map of the object.


I then had to add an 'Unwrap UVW' modifier from the Modifiers list to the sphere. This unwraps the map and flattens out the image so I can export it and begin texture it.


On the UVW panel on the right, I then clicked on the 'Open UV Editor' option to open the UV window.


I was then able to render the UV map, which I saved so I could import it into Photoshop. 

Here is what the UV map looked like:


Once I'd imported the UV map of the body sphere into Photoshop, I played around with the image and kept using the Material Editor back in 3dsMax to place the image onto the sphere. I did this because I wanted to establish which part of the UV Map belonged where on the sphere so that I could texture it accordingly.

After I'd figured out which part of the map belonged where on the sphere, I began to start creating my texture. I selected the 'Line' tool at first and made sure it was reasonably thick and chose a dark grey colour from the pallet. I then drew two lines at the top and bottom of the image on the first and third lines on the map. This created two circles at the front and back of the sphere.

I used the Fill tool to now fill in the remaining area of the map with a light grey I had chosen from the colour pallet. This colour would be the main colour of the ship.

I now wanted to add individual lines in between the two top lines to split the circle up into sections. I did this by simply drawing vertical lines at various points along the lines, I tried to make them a fairly equal distance apart but wasn't worried about them being too accurate.

As soon as I'd finished splitting up the lines, I began to create boxes inside each individual section. These boxes were designed to be the windows of the ship. I used the box tool from the panel and used the same dark grey colour that I had been using previously. I then created a box in each section trying to make them roughly the same size from the top and bottom of each. Once I'd finished doing this, I merged all the different layers of lines and boxes together to make it clearer and more organised. I then copied and pasted the layer using the shortcut 'ctrl' + 'c' to copy and 'ctrl' + 'v' to paste it. I then moved the layer directly down in between the bottom two lines, so that the top and bottom both matched each other. This created 'windows' at both the front and back of the sphere.

Now I had finished creating the windows of the ship, I wanted to create a circle on top of the sphere. I started by selecting the 'Ellipse' tool from the panel and then creating a large circle, making sure to hold down the 'Shift' key so that the circle was evenly drawn, on the left side of the image. I positioned the circle so that it was only half visible on the image as I had positioned the other half outside of the image area, and so that it was in the centre of the windows I had created previously. I also filled the circle with the dark grey colour that I had been using previously.

I went on to copy and paste the circle I had just made, and using the 'Transformation' and 'Scale' options from the top menu, I rescaled the circle slightly holding down the 'Shift' key again to make sure it was perfectly round. I made the new circle just a little bit smaller and moved it so that it was positioned evenly within the other circle. I then filled this circle with a lighter grey to contrast the two effectively.

After I had made the two circles, I copied and pasted them and positioned them on the right side of the image now holding down the 'Shift' key so that they stayed aligned. Like before, I only made sure half of the circles were visible.

I now had the basic circle made for the top of the sphere, but I wanted to add in some more detail. I selected the Box tool from the panel again and selected the dark grey colour I had been using. I then created various boxes of different sizes and shapes in both half circles. I did this to add to the mechanical look of the ship and to make it look more authentic.

Additionally, I drew over some of the dark grey boxes, putting a smaller box or thin line within them. For this, I used a light grey colour. I did this just to add a bit more detail to the texture.

Once I had finished making the top circle of the sphere, I now wanted to make the bottom one. Like before, I copied and pasted the two circles I had made originally and positioned them in the centre between the two half circles. However, this time I used the 'Transform - Scale' tool to make the circle slightly more into an oval shape so it would sit appropriately on the sphere and wouldn't look wonky at all.

I then went on to use the Box tool again to create small dark grey boxes within the circle like I had done before. I positioned them randomly in no particular position to again make it look more realistic. I also added smaller light grey boxes and lines within them.

Now that I had completed the detail for both the top and bottom of the sphere. I wanted to add just a little more detail in the remaining space on the map. Because of this, I got the Box tool again and created some dark grey boxes in the empty space left between the windows and the circles.

Here is what the final texture looks like:


Now that the texture for my sphere was complete, I went into 3dsMax and loaded the Material Editor window to load in my texture.


This is what the texture looks like on the sphere:


Sunday 27 November 2011

Texturing My Tie Fighter - Part 1

In order to start texturing the wings of my tie fighter, I first had to create a UVW Map. 
I added a 'UVW Map' form the modifier list, to begin with. This creates a map of the object.


I now had to add an 'Unwrap UVW' modifier from the modifiers list. This was to unwrap the map so that I would be able to export it and texture it in Photoshop.


From the new Unwrap UVW panel on the right: 


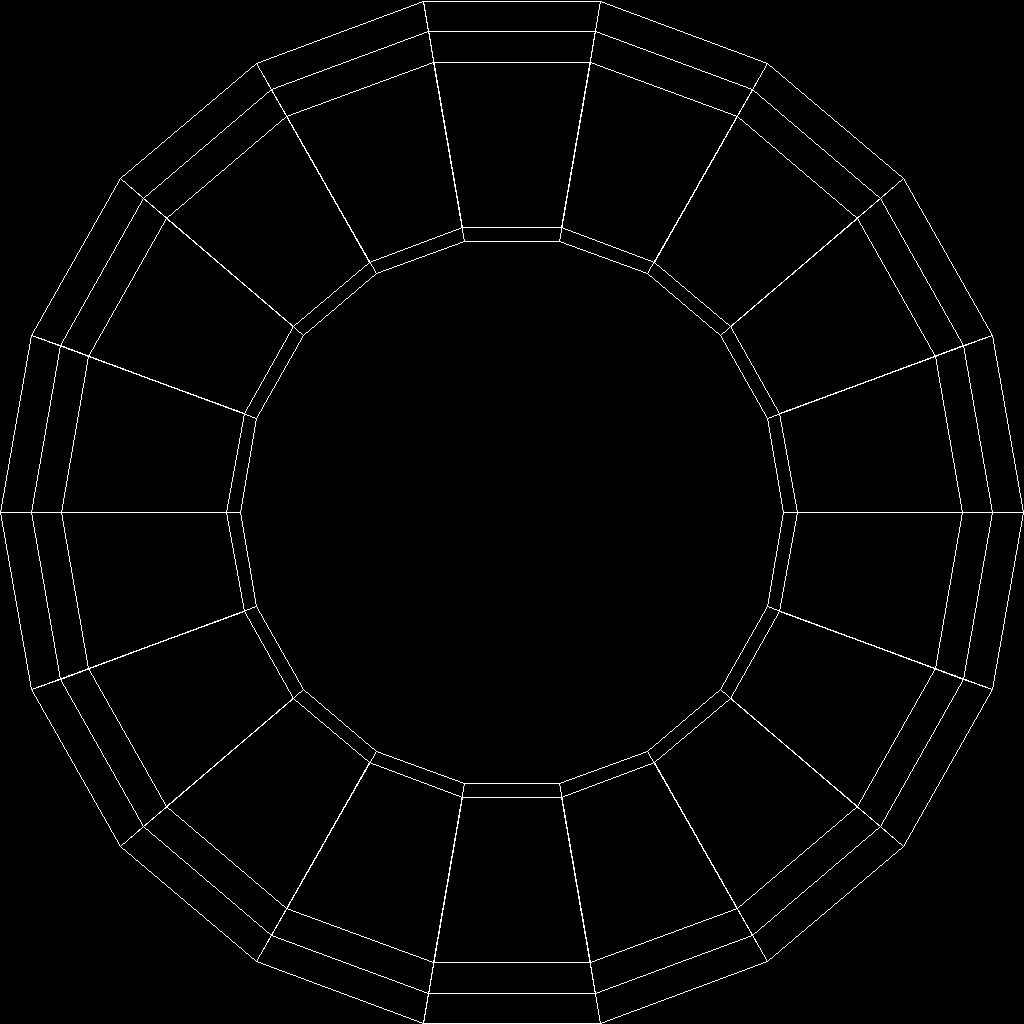
I chose to open the UV Editor so that I would be able to render the final map and save it. Here is what the final map looked like:


Once I'd imported the UV map into Photoshop, I was ready to start editing the image so that it looked like the wing of the tie fighter. 
I started by getting the 'Pen' tool first and going round the very edge of the shape until I had joined the start and finishing points. I then did this again, only this time I started about a centimetre inwards to draw the shape. As soon as I had completed the two pen lines around the shape, I got the fill tool from the tools panel and selected a light grey colour from the colour pallet, and filled in the area between the two pen lines. 

Now the edge of the wing was made, I wanted to start making the centre of it. Because I wanted the inner part of the wing to be the same shape as the rest of the wing, I felt it was better to copy and paste the edge I had just created rather than trying to draw the shape freehand. So I used the short cut 'ctrl' + 'c' to copy it and 'ctrl' + 'v' to paste it. I then highlighted the new layer which had been created and went to the menu at the top and chose the 'Transform' option and 'Scale'. I then held down the shift key so that I could transform all the sides equally, and made it the correct size and made sure it was positioned in the centre of the shape.

Using the same technique as before, I copied and pasted the same shape and transformed the scale of it so that it became small enough to fit just inside the shape I had previously made. I then selected the Fill Tool again and from the colour pallet I selected A slightly darker shade of grey and filled the shape. 

After this, I copied and pasted the shape for one final time. I transformed the scale again so that it fitted snug inside the previous shape, and altered the colour so that it was an even darker shade of grey. 

I now wanted to create two smaller circles to fit in the very centre of the shape. To do this, I selected the 'Ellipse' tool from the panel and held down the 'Shift' key whilst I drew the circle so that it came out perfectly round. I then filled it with a darker shade of grey than before. Using the shortcuts, I copied and pasted the circle and transformed the scale so that it became slightly smaller than the one previous. I filled the final circle black.
Once I'd created all the inner sections of the wing, I merged all the different layers together to keep them tidy and clear.

Now I wanted to start creating the six spokes of the wing. I did this by getting the 'Pen' tool again and drawing two straight lines with points at both ends going from the outer edge to the second inner shape. I filled this spoke the same grey that I had used to fill the second inner shape. I also, drew a thick dark grey line going down the centre of the spoke. For this line, I used the 'Line' tool and adjusted it's thickness.

As I had one spoke made, I felt it would be easier to copy and paste this five more times so that all of the spokes would match evenly. After I had all my six spokes pasted, I went to the top menu to the 'Transform' option, and this time chose 'Rotate'. I then rotated all the spokes accordingly so that they were all in the correct position on the wing.

Additionally, at the end of each spoke (towards the centre), I drew a thinner black line using the 'Line' tool connecting the end to the centre black circle so it looked like they were all joined.  As soon as I had all my spokes in the correct place, I merged all the layers together so that they were all in one layer to make it easier.

The last thing left to create was the fine grey lines against the black, between each spoke. To do this, I selected the 'Line' tool and made sure I had a thin line selected in the options panel. I then went on to draw multiple lines directed from the outer edge inwards towards the centre. This took quite some time, but once I had made them all I merged all the separate layers together to tidy it up (as there was about 90 odd different lines).

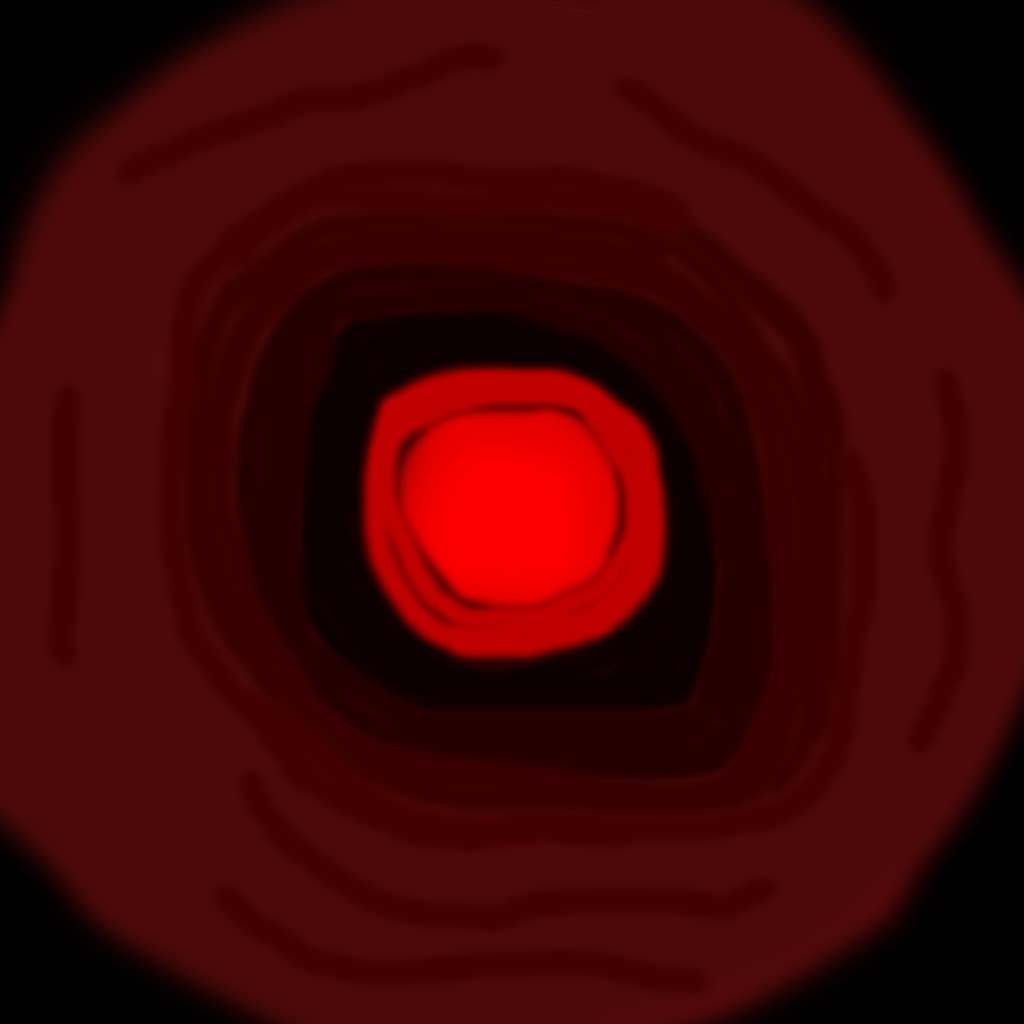
Here is what the final wing looked like:


My wing texture was now ready to import into 3dsMax. So I saved the image and then back in 3dsMax, I opened up the material editor window.


I selected the image by going to the grey box next to the 'Diffuse' option and selecting bitmap then my image. I then clicked the icon to apply the texture to the wing.


Making A Sky Dome

To create my sky dome, I started out by creating a 'Geosphere' by clicking on the icon in the right Command Panel, under the Create section. 


I then clicked and dragged in the viewport to create the sphere. Once I'd made my sphere, I clicked in the Modify panel and selected 'Hemisphere'. 


This deleted half of the sphere. 


Now that my hemisphere was made, I needed to add a 'Normal' modifier to it. To do this, I went to the Modifier panel, and from the Modifiers list, I chose 'Normal'. 


I then chose the 'Flip Normals' option in the panel. I did this because it flips the normals of the object so that it is visible from the inside, which is what is needed as my scene is all going to take place within it. 

I now went to the Modifiers list again and this time chose the 'XForm' modifier.


Once the modifier was applied, I went to the 'Gizmo' level within it, and I now wanted to rescale the sphere. I flattened the sphere slightly, by pulling down the vertical axis. I did this because by making the sphere slightly flatter on top, it gives a more realistic feel and shape to it.


Now that I had successfully created my Geosphere, it was now time to add the sky texture I had found previously. To do this, I made sure the sphere was selected, I then went to the Materials Editor window at the top. I selected an empty sphere, then under the Blinn Parameters, I clicked the small grey box next to the Diffuse option. 


I then chose a Bitmap option and selected my Sky texture and applied it to the sphere.


Wednesday 16 November 2011

Further Volcano Height Maps


Accessed [16/11/2011]

Volcano - Noise Effect and Cloning

After I'd textured my volcano, I decided that I wanted to add a 'Noise' effect, like I had on the lava, to make the volcano look more sharp and rough, especially at the top as I felt it was too flat. 


To add noise, I selected the volcano and then went to the 'Modifier List' and chose 'Noise from the drop down menu. 


I played around with some of the settings until I got my desired effect. For example, I altered the noise 'Scale' which pointed some of the edges and made them slightly obscure, and changed the 'Strengths' of some of the axis's so that they weren't all the same. 

This is what the volcano now looks like with the noise effect added:


Now that my volcano was complete. I needed to clone it so I could put it on top of the over mountain. To do this, I used the short cut 'ctrl' + 'c' to clone the image, and then 'ctrl' + 'v' to paste the image. When I did this, the 'Clone' window came up.


For this, I selected the 'Clone' option and named the new volcano 'Volcano002'. 

Once I had cloned my volcano, I now had to position it. I did this by using the 'Move' tool and using the axis's to position it on top of the mountain like I had done previously. 

Additionally, I wanted to alter the new volcano slightly so it wasn't exactly the same as the other. I used the 'Scale' tool and selected all the axis's to make them all equally smaller. I also adjusted them all individually to an extent, so that it was slightly thinner and not as circular. 

I also adjusted the 'Noise' effect a tiny bit too. I changed the 'Scale' of the noise so that the top wasn't as pointed as the other one.


Texturing My Volcano

I now wanted to start texturing my volcano. To do this, I firstly had to apply a 'UVW Map' from the 'Modifier List' to the volcano.


I added a UVW Map to the volcano in order to create a map of the object so that I would eventually be able to texture it. 


I then had to add a 'UVW Unwrap' from the 'Modifier List'.


I needed to do this because the object is circular and not completely flat. Therefore, by doing this, it flattens out the object so I will be able to take the map into Photoshop for example and create my own texture, which I will be able to lay over the top of the volcano.


I then clicked on the 'Open UV Editor' option under the 'Edit UV's' section, to bring up a new window.


From the new window, I had to click the 'Tools' option from the top menu and then select 'Render UVW Template'.


A smaller window then popped up where I simply just clicked on the bottom option, 'Render UV Template'.

This then rendered my UV map, which looked like this:


I was now able to save this image and then import it into Photoshop so I could begin creating my volcano texture.

To start with, I got the 'Brush tool' and set the brush size so that it wasn't too big and and had a faded edge, to give a softer edge feel. I then chose a semi light brown colour and coloured in the entire volcano area as this was going to be the main colour of the volcano.
After this, I chose a really bright red colour for the inner part of the volcano, for the lava. I then went around it with a ever so slightly darker red, making sure to leave a slight gap between the two so you could see their edges, which looked like they were glowing slightly because of the faded brush edge I had used. 
I then chose a really dark, almost black, brown colour. I then went around the red with this. I didn't worry about making it completely circular as I didn't want it to be perfect. Instead, I made more of an oval shape so that two edges were more pointed than the other two. This would add to the effect once it was placed on the volcano in 3dsMax. 
For the next colour, I went for a slightly lighter shade of brown and coloured this the same way. I repeated this for one more lighter shade of brown too. 
I didn't want to continue to add anymore coloured layers as I wanted to show some of the remaining brown I had started colouring the image with. However, I did add some small wavy lines around the the outer lighter brown brown area just to add more effect because I didn't want it to be left completely one colour.

Here is what the final coloured volcano image looks like:


Now that I had my volcano texture completed.  I saved the image and opened up the 'Material Editor' window back in 3dsMax.


To import the texture, I clicked on the small grey box next to the 'Diffuse' option, selected 'Bitmap' and then chose the image file. I then clicked on the icon to apply the image to the volcano. 


Volcano - Importing and Effects

Now that my lava was complete,  I wanted to import the volcano that I had previously made in another file. To do this I went to the 3dsMax icon at the top and chose 'Import' then 'Merge' and selected the file containing my volcano.


Once I'd imported it, it was much bigger in comparison to my lava so I had to resize it. To do this, I selected the volcano, and chose the 'Scale' option at the top. I clicked in the small yellow triangle between all the axis's so that I would rescale all of them equally. I rescaled the volcano accordingly so that it fitted on top of the 'mountain' area of the lava.
I didn't sit my volcano directly on top of the mountain, but had it so that part of it was just underneath it. This allowed parts of the mountain and the lava to peak through the volcano so it looked more rough and eroded, which added to the look of it as it wasn't as smooth.


Now that my volcano was positioned correctly, I wanted to add some effects as I felt it was too smooth in comparison to the rest of the scene and needed roughening up!
I went through different effects and experimented with them until I finally decided on using the 'Quadify Mesh' option from the 'Modifier List'. I chose this one because I felt like it gave me the effect I was looking for. It created indents in the volcano so it looked more eroded and no longer as smooth as it did previously.


I played around with some of the settings to see what each of them did. I eventually got the effect I wanted to make the volcano look more worn and naturalistic by adjusting the Quad Size to 3.5%.

Here's what the volcano looked like after I had finished changing the effects:


Adding Lava textures and Further Effects

As I had now completed my lava texture in Photoshop, I wanted to add it to the lava plane I had already created. I did this by opening up the 'Material Editor'.

On the 'Diffuse' option, under the Blinn Parameters, I clicked the small grey box next to it, selected the 'Bitmap' option and then chose the coloured height map image. I then clicked the icon near the top to apply the image to the plane.


I was pretty happy with how the lava came out, especially on the higher points of the lava with the black and bright orange contrast, which looks really effective and stands out.


However, I still thought there was something missing. I thought the lava looked too smooth. I wanted to make it look more dynamic, like it was moving and to add the aspect of danger.
After going through several different effects to see which had the best impact, I decided on the 'Noise' modifier, from the 'Modifier List'.


I played around with some of the options to see how they effected the lava. For example, I changed the Strengths of some axis's so it effected them in different ways and changed the 'Scale' of the noise so that it had a greater impact. 

This is how the lava looked after I had finished editing the effects of it:


It now looks like the lava is moving as it has a kind of 'wave' feel about it. It also looks more pointed with jagged edges, so it looks more dangerous than before.